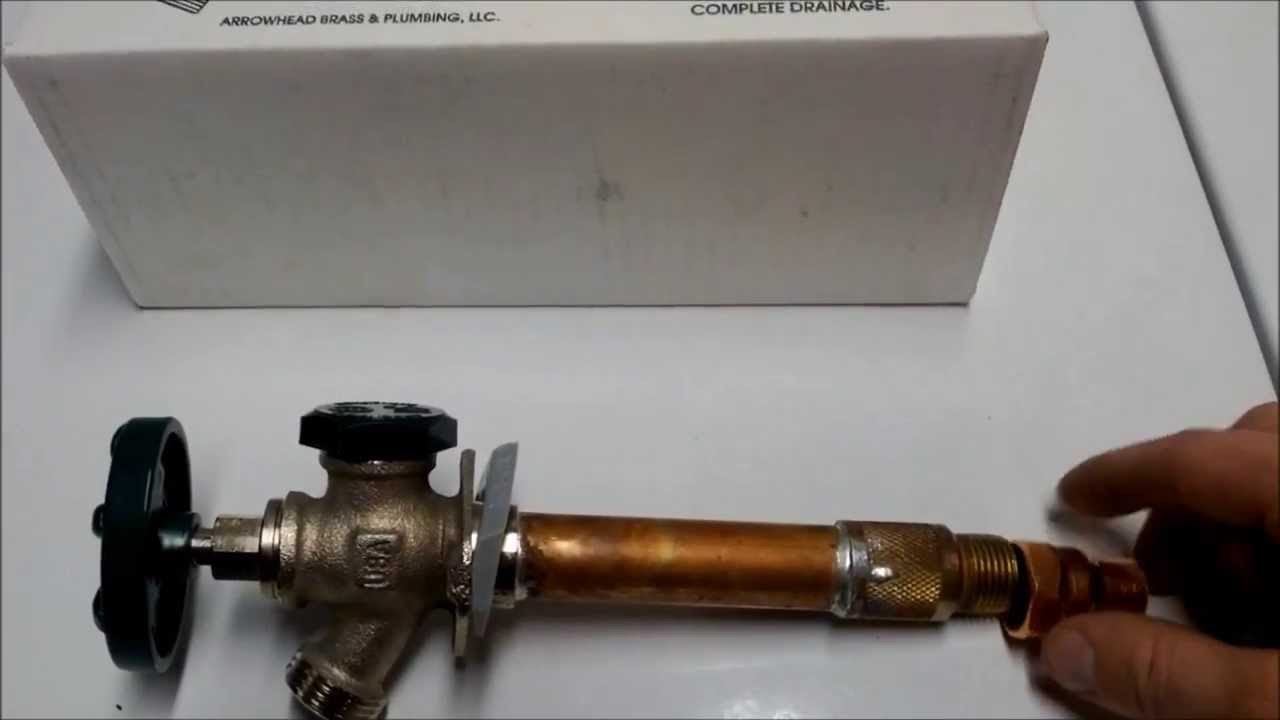
If you reside in a cold area, a frost-free sillcock outdoor faucet can be a godsend. When you use this method to avoid water from freezing in your pipes, you’ll also be keeping it safe from potentially harmful contaminants. It is possible that the frost-free sillcock faucet’s body will need to be replaced if it is subjected to prolonged exposure to subzero temperatures.
When it comes to installation, a frost-free sillcock faucet might cost a lot more than a simple device. It’s better to save money and do it yourself! Anyone can do it, and it’s not difficult at all. To replace a frost free sillcock outdoor faucet, all you need to do is follow our step-by-step instructions!
What will you need
Before beginning your DIY project, gather all of the necessary materials. If you don’t already have these, you may pick up the rest at your local hardware shop or order them online. You’ll need the following items:
- Adjustable wrench
- Pipe wrench
- Drill
- Drill bits
- Frost-free sillcock faucet
- Pipe tape
- Screws
- Pliers
Before replacing the faucet
Here’s what you need to do before diving into this project and learning how to replace a sillcock.
- Turn off the water supply to the outside faucet that has already been installed by turning off the water supply valve.
- Switch the water heater off or to pilot mode.
- Let all the water that is still in the pipes run off the faucet.
The faucet can now be used without fear. As a result, we’re going to continue working on the project.
Remove the present frost-free sillcock outdoor faucet by following these simple steps.
Before you can install a new outdoor faucet, you’ll need to remove the old one. What you need to do is as follows:
- The previous faucet’s neck should be tightened using an adjustable wrench or a pipe wrench starting at the wall attachment point.
- Start twisting the wrench anticlockwise by gripping it firmly.
- The original sillcock faucet’s inner workings can be accessed by unscrewing the nut.
- As soon as you remove this section of the previous faucet, you’ll be able to observe whether or not the washer has been ripped.
In the event that only the part that comes out needs to be replaced, you can simply purchase the replacement part and replace it. It may be necessary to remove the entire faucet from the source if a replacement part is not available or if the faucet itself is too worn out to be repaired or replaced. Then we can go to the next stage.
- Locate the source of the leak behind the wall of the house you’re renovating.
- Using a wrench, disconnect the faucet’s connection to the water pipes in your home.
- Pull the complete frost-free sillcock faucet out of the wall from the outside.
Installing a new frost-free sillcock outdoor faucet requires the following steps.
In this case, it may be necessary to purchase a new part from the store. However, if your frost-free, sillcock faucet is too worn out to be utilized, you may wish to buy a new one. You won’t be spending a lot of money if you decide to install one yourself and don’t hire a professional to do it for you.
A new one can be set up in a matter of minutes. Replacing a frost-free sillcock outdoor faucet can be accomplished as follows:
- Install the new frost-free sillcock faucet in the same location where you removed the old one.
- Return to the inside of the wall and use some pipe tape to cover the new faucet’s back end.
- Reattach the water pipe that was previously disconnected from the old faucet by using pliers to grip the end of the faucet.
- Before you begin, reopen the water valve you shut before you began the project.
- Move back to the interior wall and check for any leaks where you connected the new faucet to the water supply.
- The outdoor faucet outlet is located on an exterior wall.
- Attach it to your home’s wall by screwing it in from both ends. A frost-free sillcock outdoor faucet that differs in size or shape from the old one may necessitate the need for new holes to be made in the wall.
- Check to verify if water is coming out of the faucet properly by opening it.
Conclusion
So there you go! A plumber isn’t necessary. You don’t have to spend a penny on these simple plumbing tasks. Before you begin, you’ll want to learn how to replace a frost-free sillcock faucet on an outdoor patio.
Your outdoor water supply will be back to normal once you install a new frost-free sillcock outdoor faucet. For the foreseeable future, you’ll have clean water for your garden that won’t freeze in the pipes.

